DIY Patio & Pathway Ideas
Patio & Pathway Ideas Using UK-Friendly Materials for Your Garden Project
4/1/20255 min read
DIY Patio & Pathway Ideas Using UK-Friendly Materials for Your Garden Project
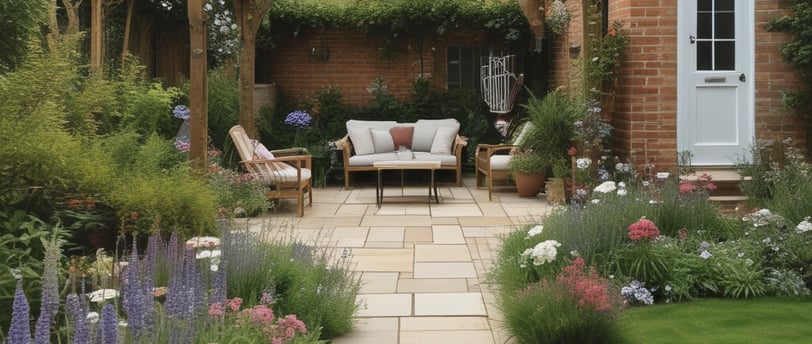
Creating a beautiful outdoor space doesn't have to be expensive or complicated. DIY patio and pathway projects using UK-friendly materials can enhance any garden, providing both functionality and aesthetic appeal. With a range of options available, homeowners can choose materials that are not only sustainable but also in harmony with the local environment.
From rugged gravel paths to sleek paved patios, there is a wide array of ideas that suit various styles and budgets. Natural stones, reclaimed bricks, and eco-friendly composites offer unique textures and colours, allowing individuals to tailor their outdoor areas to their taste. Practical solutions, such as using permeable materials, also support better drainage and promote a healthier garden ecosystem.
For those ready to roll up their sleeves, these DIY projects provide a rewarding opportunity to personalise outdoor spaces while enhancing property value. With careful planning and the right materials, anyone can create inviting patios and picturesque pathways that make a garden truly come alive.
Evaluating Your Outdoor Space
Before starting any DIY project, it is essential to evaluate the outdoor space. This entails careful consideration of factors such as the physical dimensions of the area and the local climate. Both elements play crucial roles in deciding what materials and designs will work best.
Space Planning and Measurement
Effective space planning begins with accurate measurements. It is advisable to use a measuring tape to record the length and width of the patio or pathway area.
Create a Scale Drawing: This can help visualise the layout and determine where to place furniture, planters, or decorative elements.
Consider Accessibility: Ensure pathways are at least 1 metre wide for easy movement.
Identify Existing Features: Take note of any trees, shrubs, or structures that may influence design choices.
By planning based on these measurements, one can maximise the use of space and identify the best materials suited for the environment.
Considering Climate and Weather
Climate is a significant factor when choosing materials for outdoor projects. Different materials have various levels of durability and maintenance requirements influenced by local weather conditions.
Rain and Moisture: Opt for materials that resist rot and mildew, such as treated timber or certain stone options.
Sun Exposure: Consider UV-resistant options for areas with high sun exposure to prevent fading and deterioration.
Temperature Variations: Choose materials that can withstand freezing temperatures if the region experiences harsh winters.
By taking climate into account, one can ensure that the chosen materials will have a longer lifespan and maintain their appearance throughout the seasons.
Materials Selection
Selecting the right materials for a DIY patio or pathway is crucial. Key considerations include sustainability, durability, and visual appeal to ensure the finished project meets practical and aesthetic needs.
Sustainable UK-Sourced Materials
Using sustainable materials contributes to environmental conservation. Options like reclaimed bricks, natural stone, and timber from responsibly managed forests are excellent choices. These materials not only minimise carbon footprint but also support local suppliers.
Reclaimed bricks offer a rustic charm and varied colours, making each installation unique. Natural stone, such as granite or sandstone, blends beautifully into gardens and landscapes. Sustainable timber, treated without harmful chemicals, can also be employed for edging or decking, ensuring longevity.
Durability and Maintenance
Durability is vital for outdoor applications due to weather exposure. Natural stone is exceptionally robust, resisting wear and tear over time. In contrast, concrete slabs provide a sturdy, long-lasting option, particularly in high-traffic areas.
Maintenance is another consideration. Low-maintenance materials, like porcelain tiles or natural stone, require minimal upkeep beyond occasional cleaning. Choosing permeable materials can also aid in drainage, reducing the risk of surface damage and extending longevity.
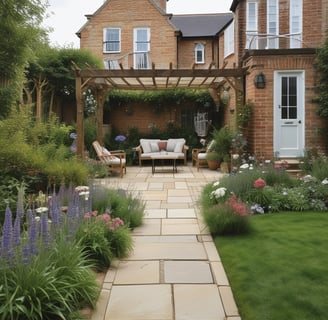
Aesthetic Appeal and Design Harmony
The visual impact of materials should complement the property and surrounding landscape. A cohesive palette of colour and texture enhances the overall design. Natural stones lend elegance and sophistication, while reclaimed bricks add character.
Combining materials, such as using timber with stone or brick, can create visually interesting patterns. The chosen materials should consider existing home features, ensuring compatibility with architecture and garden style for a harmonious look.
DIY Patio Installation
Creating a sturdy and attractive patio involves careful preparation and installation. Attention to detail in the foundational work,laying the pavers or stones, and completing the final touches is crucial for a successful DIY project.
Foundation Preparation
Preparing the foundation is essential for the stability of the patio. This involves several steps:
Site Measurement: Determine the patio size with stakes and string.
Excavation: Dig out the area to a depth of approximately 15-20 cm. This depth allows for a solid base and drainage.
Base Layer: Fill the excavated area with a layer of crushed stone or gravel. This should be compacted well to create a strong foundation.
Leveling: Use a spirit level to ensure the base is smooth and even. Proper levelling prevents water pooling on the surface.
Laying Pavers and Stones
Once the base is prepared, the next step is laying the pavers or stones.
Choosing Materials: Select pavers suitable for outdoor use, considering durability and aesthetics. Options like natural stone, concrete, or terracotta are popular.
Laying Pattern: Begin laying pavers from one corner and work systematically towards the opposite side. Maintain consistent gaps between pavers.
Cutting Pavers: Use a wet saw or stone cutter for any required shapes or sizes around edges or obstacles.
Compaction: After placing the pavers, compact them with a mechanical plate compactor to create an even surface and enhance stability.
Grouting and Finishing Touches
Finishing touches enhance both the appearance and durability of the patio.
Jointing Material: Fill the gaps between the pavers with sand or grout. Choose polymeric sand for its resistance to weed growth and erosion.
Sealing: Consider applying a sealant to the surface. This helps protect against stains, moisture, and fading.
Cleaning: Clean the surface with a pressure washer or hose to remove debris. Allow the patio to dry thoroughly before use.
Landscaping: Add edging, plants, or decorative features to complete the patio's appearance.
Following these steps ensures a well-constructed and appealing DIY patio.
Pathway Design and Creation
Creating functional and aesthetically pleasing pathways requires careful consideration of layout, materials, and installation techniques. Pathways should enhance outdoor spaces while ensuring durability and ease of maintenance.
Pathway Layout and Function
Pathway design begins with determining the purpose and layout. Whether for access, aesthetics, or both, pathways must be navigable and complementary to the garden's features.
Straight paths offer a formal look, while curved paths can create a more natural flow. Consideration of surrounding plants and structures helps in crafting a harmonious design.
Width is crucial; typical pathways range from 75cm to 1.2m. Wider paths accommodate two people walking side by side, enhancing usability.
Incorporating stepping stones or defined edges can also guide foot traffic, keeping carpets of grass or gravel intact.
Material Consideration for Walkways
Selecting the right materials is essential for a successful pathway. Common options in the UK include natural stone, bricks, and gravel.
Natural Stone: Durable and aesthetically pleasing, stones like slate or sandstone withstand weathering.
Bricks: They offer a traditional look and are versatile in pattern design.
Gravel: An affordable option, gravel allows for drainage but may require periodic replenishment.
Sourcing materials locally not only supports sustainability but also ensures compatibility with local climatic conditions.
Permeable options are advisable for drainage, reducing puddling and erosion.
Installation Tips for Longevity
Proper installation techniques significantly enhance the lifespan of pathways.
Begin by clearing the area of grass, weeds, and debris. Establishing a solid foundation is vital; compacted soil or a sub-base of sand or gravel works well.
For stone or brick pathways, lay them on a bed of sand to assist with drainage and stability.
Consider installing edging to define the path and keep materials from spreading. Using landscape fabric beneath gravel or mulch can help prevent weed growth.
Regular maintenance, such as cleaning debris and re-compacting gravel, supports longevity. Following these steps ensures that pathways remain attractive and functional for years.
All Outdoor Things
Your destination for all things outdoors
© 2025. All rights reserved.